When it comes to household appliances, your trusty old dryer ranks high on the list of convenience and time-savers. There’s nothing quite like the feeling of slipping into a warm, freshly dried shirt on a chilly morning. But, like any other piece of machinery, your dryer requires a little TLC to ensure it keeps performing at its best. In this in-depth guide, we’ll delve into the nitty-gritty of dryer maintenance, helping you extend its lifespan and boost its efficiency.
The Importance of Dryer Maintenance
Before we dive into the details, let’s address the most critical question: Why should you bother with dryer maintenance in the first place? Well, think of it this way—your dryer is like the engine of your laundry routine. If you neglect it, it can become less efficient, costlier to run, and may even break down prematurely.
Proper maintenance not only keeps your clothes feeling fresher but also prevents potential fire hazards. Lint, the fluffy substance that accumulates in your dryer, is highly flammable. By keeping your dryer clean and well-maintained, you reduce the risk of lint-related fires, which can be catastrophic.
So, let’s roll up our sleeves and get down to business. Here’s everything you need to know about maintaining your dryer for optimal performance.
Regular Cleaning: The Foundation of Dryer Maintenance
Clean the Lint Filter After Every Load
Imagine eating a meal and not brushing your teeth afterward. Over time, it would lead to serious problems. The same principle applies to your dryer’s lint filter. After each drying cycle, it’s crucial to remove the lint from the filter.
Why is this so important?
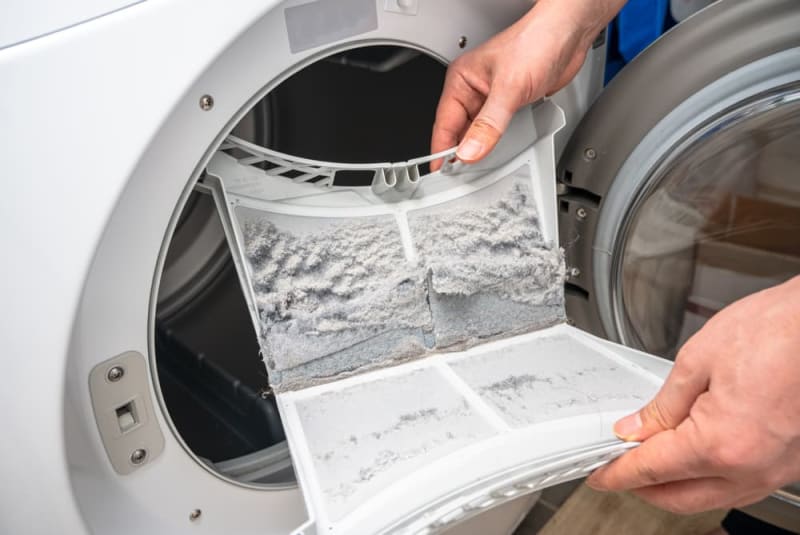
When lint accumulates, it restricts airflow within the dryer. This forces the machine to work harder, which can reduce its efficiency and shorten its lifespan. Neglecting the lint filter is like letting plaque build up on your teeth—eventually, it’ll cause problems.
How to do it:
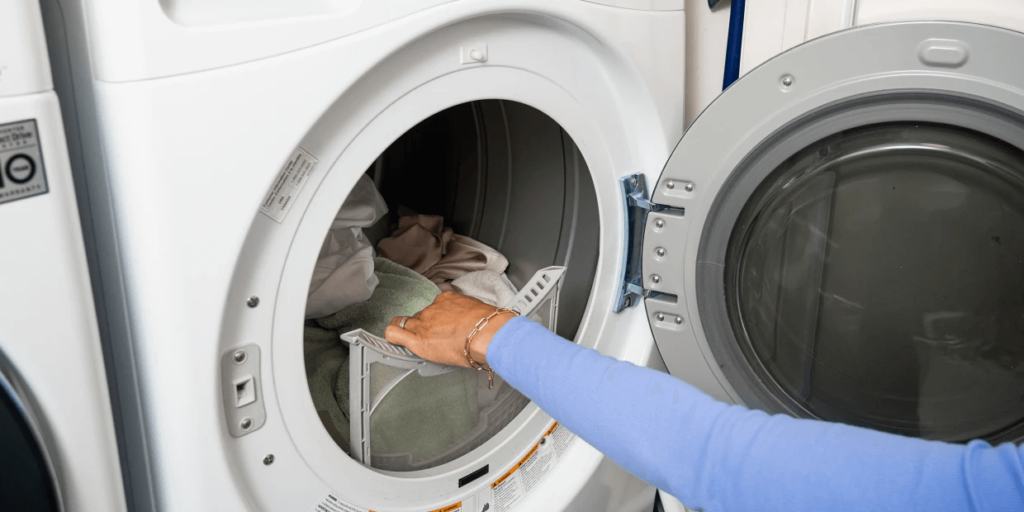
- After every load, locate the lint filter in your dryer.
- Gently pull it out and remove the lint by hand or with a soft brush.
- Replace the filter, ensuring it clicks securely into place.
Deep Cleaning: Periodic Maintenance for the Lint Filter
Besides the daily cleaning routine, you should perform a more thorough lint filter clean every few months. This step helps eliminate any lingering residue that may escape the regular cleaning process.
How to do it:
- Remove the lint filter from the dryer.
- Using warm, soapy water and a soft brush, gently scrub the filter.
- Rinse the filter thoroughly to remove any soap residue.
- Allow it to dry completely before placing it back in the dryer.
Ventilation: Ensuring Proper Airflow
A dryer is all about airflow. It draws in air, heats it, circulates it through your clothes, and expels moist air outside. For this process to work optimally, you need to ensure unobstructed ventilation.
Inspect and Clean the Vent Pipe
Your dryer’s vent pipe is the passageway for moist air to exit your home. If it’s blocked or obstructed, the drying process will be significantly less efficient, and it could even pose a fire hazard.
How to do it:
- Unplug the dryer or turn off the gas supply.
- Disconnect the vent pipe from the dryer and the exterior vent.
- Check the vent pipe for obstructions, such as lint buildup, debris, or even critters.
- Use a vacuum or a vent brush to remove any obstructions.
- Reconnect the vent pipe securely.
Ensure Proper Ventilation Installation
Proper installation of your dryer’s venting system is essential. The vent pipe should be as short and straight as possible to minimize obstructions. If it’s crimped or bent, it can restrict airflow.
How to do it:
- Check if your dryer’s venting system is correctly installed according to the manufacturer’s guidelines.
- Ensure the vent pipe is not excessively long or overly convoluted.
- Replace any damaged or compromised sections of the vent pipe.
Drum Maintenance: Silence the Squeaks

The drum in your dryer is where all the action happens. It’s the part that rotates, ensuring your clothes dry evenly. But like any moving part, it can wear out and become noisy over time.
Lubricate the Drum Bearings
If your dryer starts emitting strange squeaking or thumping sounds, it’s time to give some attention to the drum bearings. These bearings can wear out, causing friction and noise.
How to do it:
- Unplug the dryer or turn off the gas supply.
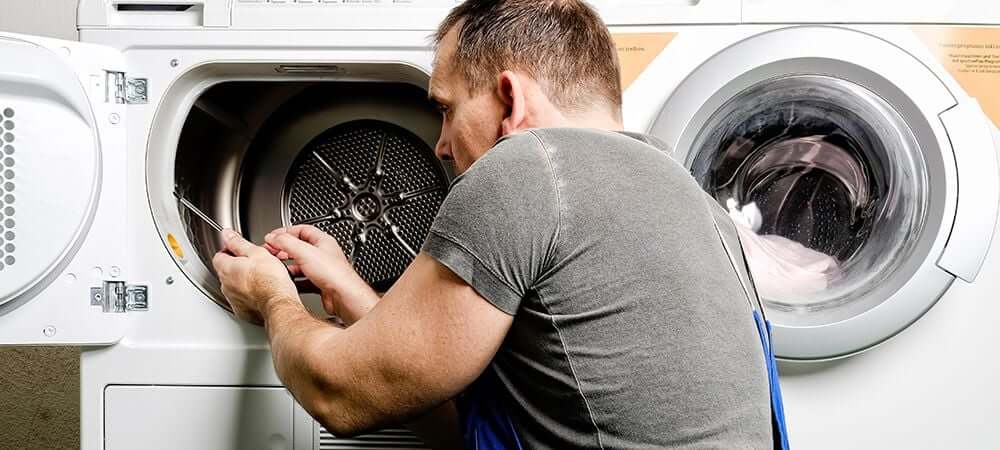
- Remove the dryer’s front panel or top panel (refer to your owner’s manual).
- Locate the drum bearings and apply a few drops of high-temperature lubricant to them.
- Reassemble the dryer and test it.
Common Dryer Problems and How to Tackle Them
Problem: Clothes Take Forever to Dry
Solution: If you find that your dryer takes longer to dry clothes than it used to, it’s often a sign of reduced airflow due to a clogged vent. Start by cleaning the vent pipe, lint filter, and the area behind the dryer. If the problem persists, it might be an issue with the heating element, thermostat, or thermal fuse, which should be inspected and replaced if necessary.
Problem: The Drum Won’t Turn
Solution: When the drum fails to rotate, it could be due to a worn-out or broken belt. First, unplug the dryer and remove the front or top panel to access the belt. Inspect it for wear and tear, and if necessary, replace it. Be sure to consult your owner’s manual for instructions specific to your dryer model.
Problem: Weird Noises Galore
Solution: Unusual noises coming from your dryer could be a sign of worn-out drum bearings, damaged or misaligned components, or foreign objects lodged in the drum. Follow the steps mentioned earlier to lubricate the drum bearings. If the problem persists, consider calling a professional technician to diagnose and resolve the issue.
A Comprehensive Dryer Maintenance Checklist
Here’s a checklist summarizing the key maintenance tasks:
- Clean the lint filter after every load.
- Perform deep cleaning of the lint filter every few months.
- Inspect and clean the vent pipe for obstructions.
- Ensure proper ventilation installation.
- Lubricate the drum bearings when you hear strange noises.
- Regularly check and replace the dryer belt if needed.
- Keep your dryer’s exterior clean and free of dust and debris.
Maintaining your dryer is a bit like caring for your car. Regular check-ups and a little tender loving care can keep it running smoothly and efficiently. With proper maintenance, you’ll enjoy faster drying times, lower energy bills, and a longer-lasting dryer.
Optimizing Dryer Efficiency and Longevity: Additional Tips

While we’ve covered the fundamentals of dryer maintenance, there are some additional tips and tricks that can help you get even more out of your trusty appliance.
Use Dryer Balls
Dryer balls are a cost-effective addition to your laundry routine. These nifty little balls bounce around your dryer, creating space between your clothes. This space allows for better airflow, resulting in faster drying times and reduced wrinkles.
Choose the Right Drying Cycle
Most dryers offer a variety of drying cycles, from delicate to heavy-duty. Selecting the appropriate cycle for your laundry can significantly impact energy efficiency and the lifespan of your clothes. For example, using a gentle cycle for delicates is gentler on the fabric and uses less energy than a high-heat cycle.
Dry Similar Fabrics Together
When possible, group similar fabrics together. For example, don’t mix heavy towels with lightweight shirts. This practice allows the dryer to work more efficiently since different fabrics have different drying requirements.
Avoid Overloading
While it might be tempting to stuff as many clothes as possible into your dryer, overloading can hinder airflow and result in longer drying times. It can also put extra strain on the dryer’s motor and components.
Regularly Check and Replace the Dryer Belt
The dryer belt is a crucial component that drives the drum’s rotation. Over time, it can wear out, become loose, or even break. Periodically check the belt for signs of wear and replace it if necessary. A well-maintained belt ensures smooth drum rotation and efficient drying.
Keep the Dryer Exterior Clean
Dust and debris can accumulate on the exterior of your dryer, affecting its performance and potentially causing overheating. Regularly wipe down the exterior and the control panel to prevent dust buildup.
By following these additional tips, you can further enhance your dryer’s efficiency, reduce energy consumption, and prolong its lifespan. Your clothes will thank you with quicker drying times and a longer life of freshness.
Final Thoughts
Your dryer is a workhorse that plays a crucial role in your daily life. By dedicating a little time and effort to its maintenance, you can ensure that it continues to serve you reliably and efficiently. Regular cleaning, proper ventilation, and addressing common dryer problems can make a world of difference. And with the additional tips we’ve provided, you can supercharge your dryer’s performance and make laundry day a breeze. So, go ahead, show your dryer some love—it will repay you with fresher, faster-dried clothes and the peace of mind that you’re doing your part to prevent potential fire hazards. Keep on drying like a pro!
Frequently Asked Questions (FAQ) – Maintaining Your Dryer for Optimal Performance
1. How often should I clean the lint filter in my dryer?
You should clean the lint filter after every load of laundry. This routine maintenance helps maintain optimal airflow and prevents potential fire hazards. Additionally, performing a more thorough cleaning every few months with warm, soapy water is advisable to eliminate any lingering residue.
2. Why is proper ventilation crucial for my dryer’s performance?
Proper ventilation ensures that moist air is efficiently expelled from your dryer to the outdoors. If your dryer’s vent pipe is blocked or obstructed, it can lead to longer drying times and even fire hazards. Regular inspection and cleaning of the vent pipe are essential for optimal performance.
3. How can I address a dryer that takes a long time to dry clothes?
If your dryer takes longer to dry clothes than usual, it’s often due to reduced airflow caused by a clogged vent. Start by cleaning the vent pipe, lint filter, and the area behind the dryer. If the problem persists, have a professional technician inspect and possibly replace components such as the heating element, thermostat, or thermal fuse.
4. What should I do if my dryer drum won’t turn?
If the drum in your dryer fails to rotate, it might be due to a worn-out or broken belt. Begin by unplugging the dryer and removing the front or top panel to access the belt. Inspect the belt for wear and tear, and replace it if necessary. Consult your owner’s manual for specific instructions regarding your dryer model.
5. How can I address unusual noises coming from my dryer?
Unusual noises could indicate issues with drum bearings, damaged or misaligned components, or foreign objects lodged in the drum. Start by lubricating the drum bearings as described in the guide. If the noises persist, consider calling a professional technician for a thorough diagnosis and resolution.
6. Are dryer balls a useful addition to my laundry routine?
Yes, dryer balls are a cost-effective addition that can improve drying efficiency. These balls create space between your clothes, allowing for better airflow and reducing drying times. They also help reduce wrinkles and static.
7. What’s the significance of choosing the right drying cycle for my laundry?
Choosing the appropriate drying cycle for your laundry not only impacts energy efficiency but also prolongs the life of your clothes. For example, using a gentle cycle for delicate fabrics is gentler on the fabric and uses less energy compared to a high-heat cycle for heavier loads.
8. Is it essential to keep the dryer exterior clean?
Yes, it’s crucial to keep the dryer exterior clean to prevent dust and debris buildup. Accumulated dust can affect your dryer’s performance, potentially causing overheating. Regularly wiping down the exterior and the control panel helps maintain the appliance’s efficiency.
9. Can I perform all dryer maintenance tasks myself, or should I consult a professional?
Many dryer maintenance tasks, such as cleaning the lint filter and vent pipe, you can do yourself. However, for issues like strange noises, malfunctioning components, or complex repairs, it’s advisable to consult a professional technician with experience in appliance repair to ensure the job is done safely and effectively.
10. How often should I replace the dryer belt?
The frequency of replacing the dryer belt depends on usage and wear. If you hear unusual noises or notice that the drum is not rotating correctly, it’s a sign that the belt may need replacement. Check your owner’s manual for guidance on specific replacement intervals for your dryer model.
